Tiling a Kitchen Splashback
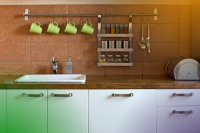
Knowing how to tile a kitchen splashback is essential for keeping your worktops clean and tidy.
When using a sink, water and other liquids can potentially splash onto your walls, ruining the paper and/or paint.
Knowing how to tile a kitchen splashback properly allows you improve your workspace, and can potentially save you money.
If you are unsure about anything listed below, it is worth contacting a qualified tradesman who will give you the pointers that you need.
Understanding the steps needed to tile a kitchen splashback involves knowing which tools are needed for the job.
Tools Needed to Tile a Kitchen Splashback
- Mastic
- Sand Paper
- Notched Trough
- Plastic Spacers
- Grout
- Plastic Sheeting
- Rubber Grout Float
- Sponge
- Grout and Tile Sealer
- Back boarding
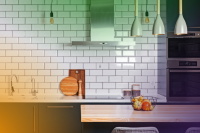
Knowing how to tile a kitchen splashback will ensure that your kitchen is more durable, and easier to clean.
Tiling a Kitchen Splashback Step By Step
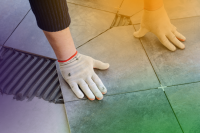
- Lay a piece of back boarding on the place you wish to work on
- Hand sand the surface of the boarding/wall lightly, ensuring not to remove any paint
- Wipe away any dust with a damp rag
- Lay out the tiles adjacent to the wall – this will enable you to measure where the tiles will be
- Record where the centre will be, on the wall, by making a mark on the edge of a middle tile
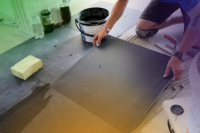
- Apply the mastic to the wall using a notched trough. Hold the trough at an angle, use a sweeping motion and ensure to start at the bottom of the wall.
- Take the centre-most, bottom tile, and press it firmly into the mastic that has been applied to the wall prior to this
- Using spacers, enable yourself enough room to leave a uniform gap between each tile
- Continue these steps along the bottom of your working area, moving out from the centre
- When the bottom is completed, continue these steps one row at a time, all the way to the top
- Allow the mastic to dry overnight
- After the mastic is dried, cover areas around the workspace with plastic sheeting
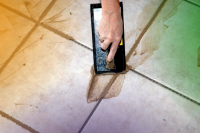
- Using the rubber grouting float, apply grout evenly over tiles, a section at a time
- Use the edge of the float to scrape off excess grout, moving diagonally to avoid disturbing the gaps
- You can ensure the grout has set sufficiently, when you apply pressure with a thumbnail, and no impression is left
- Rinsing the sponge often, wipe down the tiles diagonally to clean them up
- Once the grout is cured, you may apply the tile sealer with a sponge
- Be sure to wipe off any excess within 10 minutes, before it sets
You should now know how to tile a kitchen splashback. Again, if you are uncertain about anything listed above, be sure to contact a qualified tradesperson.
Knowing how to do it properly can save you time and money, as well as providing you with results of a professional standard.