Laying block paving is certainly not amongst the DIY projects which should be attempted by the novice DIYer.
The size of this kind of job could prove expensive if carried out badly, both in terms of materials and also in terms of damage to your existing driveway.
Hopefully our guide to laying block paving will help you in deciding whether you truly want to tackle this task or whether you'd rather bring in professional block paving contractors.
This DIY job is probably suited to tradesmen who are already fairly skilled in groundworks or similar property improvement work, or the advanced handyman or DIY lover, but nevertheless here's our guide to laying block paving.
Removal Of Your Existing Driveway - Removing The Existing Hard Surface
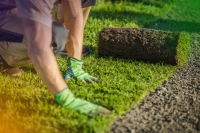
We did tell you that this job could be expensive if it went wrong and here's part of the reason. If you have any existing driveway or patio which you're looking to replace with block paving, you're going to need to remove your existing driveway. In order to lay block paving effectively, the existing surface must be removed. The method for doing this will depend whether the surface is grass, chips or tarmac. Removal of existing tarmac, flagging or asphalt, or even imprinted concrete, will take an age if carried out by hand, so the optimum course of action here is to hire a mini-digger and dig up the driveway yourself.
Small mini-diggers can be hired from tool hire companies to help with this task, and a skip will be needed to take away the debris. You will find that hiring a mini-digger is not normally as expensive as you would imagine and any good hire shop should be able to hire one of these machines to dig up your existing driveway. Take time over this stage as a well prepared surface will mean a better end result. Try to choose a design which has square edges as although curved edges can look attractive, they are far more tricky to work with than straight edged paving areas.
Ensure you find a reliable skip hire company who will not leave the skip on your driveway for weeks on end.
You need to dig the driveway down to a depth of at least 10" which allows for 6" of hardcore, a 2" depth for a sand base below your blocks and 2" for the blocks themselves. Remember when digging out that you need to ensure a 'fall' on your driveway to allow for good drainage.
This fall needs to be approximately 1:60 and ideally should fall away from your property so that rainwater, etc will leave your properties' grounds and flow towards the rainwater grids beyond the driveway.
Putting Down The Membrane and hardcore
Once the ground has been excavated to the required depth and you have removed your existing driveway, you need to ensure you lay a membrane to ensure the sand you will be laying below your block paving does not become interspersed with clay and soil below. Lay a breathable membrane which stops the hardcore mixing with the soil underneath. This will also help stop weeds growing up through the block paving once laid. Lay at least 150mm of hardcore, and make sure it is compacted down as much as possible. It is easiest to do this with a mini road roller which can be hired per day. Alternatively, a hand held compactor can be used to do this job.
A good weed control fabric will usually do the trick and is available from most high street home improvement stores without using too much technical jargon.
Laying and Compacting Hard Core
You should now lay MOT type 1 hardcore to your driveway area. Ensure that the complete area which you'll be laying your driveway onto is covered. Lay enough MOT hardcore to cover a 6" depth which will then leave 4" in total for the sand (2") and blocks (2").
Ensure that the hardcore is compacted by using a vibrating compating plate. Again, a good hire shop should be the first port of call to find these kind of tools which you'll rarely use but are needed for jobs like laying block paved driveways.
Laying Block Paved Edgings
The first real part of laying your block paving has to begin with laying the edging blocks.
Ensure that you lay the edging blocks on a good mix of sand and cement and use a tight string as a guideline to ensure that you keep your block paving edges straight.
Good Drainage is a Must
It's now a legal requirement to ensure good drainage when laying block paving, so you should now be looking to lay a drainage channel.
Again, drainage channels can be bought in strips which are laid to a slightly lower height than your blocks will come up to.
You should also look to fit a manhole cover if one is required on your driveway and ensure again that you get the measurements right on this to ensure a good fit for your blocks.
Laying Grit Sand On Your New Driveway
Next you should lay 2" worth of grit sand as a base for the block paviers and approx 20mm worth of additional grit sand to allow for compacting the grit sand which comes in the next stage of your block paving guide.
Ensure that the whole area is covered with the grit sand and that it is evenly distributed.
Compacting Your Driveway
You should next use a compacting plate again to compress / compact the grit sand you just laid to the driveway and to act as a good base for your block paviers.
Failure to accomplish this task well may lead to collapsed driveways which are uneven in the future.
Screeding The Sand For Your Driveway
Once you have got the driveway levelish with your compacting tools you will need to screed the sand very much as you would if you were levelling a floor with screed on the interior of your home.
A level base of sand is essential for a successful driveway laying project and care should be taken in carrying this out to achieve the best results possible, rather than an expensive project which might only be short lived.
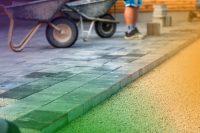
Laying Paving Blocks
A layer of sand will need to be placed on top of the hard core, then compacted into position. When starting to lay the blocks, use a string or a straight edged ruler to make sure the first row goes in perfectly straight. Choose a design which involves the minimum of cutting as the paving process will be quicker and easier. Splitting the blocks can be tricky, and again requires specialist machinery which can be hired by the day from specialist companies.
Laying The Block Paving
Once you start to lay your blocks you need to ensure that you start from a straight line - either at an angle of 90 degrees or a 45 degree angle.
Use a tight string as a guide for this if required. Additionally bear in mind that intricate patterns with block paving are not recommended for the amateur block paver. To ensure a consistency in terms of colour and textures of block paving you should mix and match a range of blocks from at least four packs of block paving (of course, these should be the same type and size), as manufacturer batches produced may differ from time to time.
Cutting Blocks
If you need to cut blocks to fill in angled areas or to complete edges, you should use a block splitter which is specially designed for laying block paving. Again, tools such as block splitters are available from good local hire shops.
Laying Paving Edging
The row of bricks or stones around the perimeter of the block paving forms the edging, and it is critical to get this stage right to ensure the finished paving is square and looks professional. Fix the edging bricks into position using mortar and keep measuring and using the spirit level to make sure that the bricks are level and even.
Final Finishing Touches
After all of the blocks are in position, the paved area needs to be brushed to remove any debris, then sand should be brushed over the entire area and into the little gaps between the bricks. Use the compactor one more time to go over the paving and make sure that all of the blocks are very firmly bedded into the ground. The finishing touch to any block paved driveway is brushing in the sand which slips between the blocks. You should use a very fine sand known as kiln dried sand. Another name for this kind of sand is silica sand, and again, this kind of block paving sand is available in most DIY stores or builders merchants.