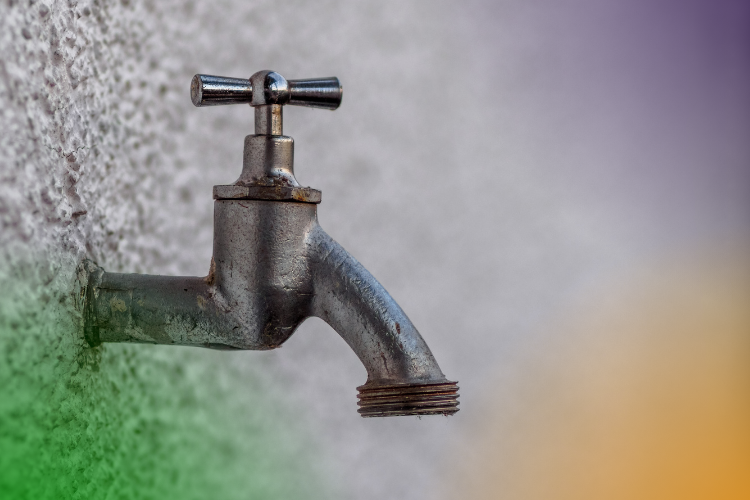
Having a cold water tap on the outside wall of your house can make everyday tasks like washing the car or cleaning the patio so much easier – no more carrying heavy buckets through the house and spilling water all over the kitchen floor. Putting an extra tap on the outside wall of the house should only take a few hours, but you’ll need basic plumbing skills and tools for the job. If you’re a DIY novice, this might be a project too big for you, so it’s perhaps best to get the plumber in. If you think you can manage the job, here’s what you have to do.
Isolation Valves
Building regulations state that you must fit an isolation valve and a double check valve when you are putting a new tap on the exterior of the building. If you already have isolation valves and are just replacing one tap with another, there is no need to add additional valves. Before starting work to fit your tap, turn off the cold water at the valve, or at the stopcock under the sink if you don’t have isolation valves fitted. If you can’t find the stopcock you can also turn off the water in the street, but you will need a special spanner to do this.
Drilling Holes
It’s always easier to attach an outside tap in a location which is close to an existing cold water pipe. A common location is on the wall nearest a kitchen sink, or by a utility room back door. It is possible to put taps elsewhere, but this will mean more pipework and connectors. Once you have worked out where your cold water pipes are and where you want to position your tap, drill a hole in your external wall, leaving at least 25cm above the damp course. Use a drill bit wide enough to drill through the wall and to allow you to feed the tap through.
Joining the Pipes
Remembering to switch the cold water supply off, the next job is to join the new pipe for the outside tap to the cold water pipes feeding the sink. You will be using a T-piece connector to provide a new feed to the outside tap, so cut a large enough section to fit the connector. File the ends of the pipework until smooth, and make sure you tighten the connector piece fully. Fit another piece of pipe through the hole you have drilled in the wall and connect it up tightly to the T-connector.
Fit the Tap
Choose a tap from the wide range available at any DIY store, making sure you choose one which is suitable for use with the diameter of pipe you have fitted. Follow the manufacturer’s instructions and make sure everything is connected tightly before turning the water back on. Many large DIY stores and plumber’s merchants will have kits containing everything you need for the job and if you get stuck, there are lots of videos and online tutorials to walk you through the job step by step.