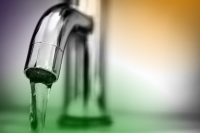
Changing a Tap
Changing a tap is one of those basic jobs which most of us would call a plumber in to tackle. But is that really necessary? With a little bit of knowledge, and a few basic tools, you could probably tackle the job yourself. Plumbers will usually charge around £75 for the job, so even if you have to buy a couple of basic tools, financially it might be worth the effort.
What You Need to Do Before Starting to Change a Tap
Don’t rush straight to the tool box and grab a spanner. It’s important to work out what you’re going to do, and which tools you’ll need before starting work. The first thing to work out is where your mains water stopcock is. Usually, you’ll find it under the sink, in the cupboard under the stairs or even in the hallway in a block of flats. You’ll also need spanners, a wrench, pliers, a bowl to catch any drips, and an old towel or rags.
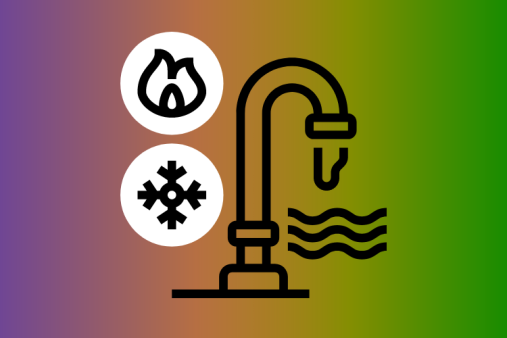
Turn the Water Off and Drain the System
Turn the water off at the mains supply and open the tap. This will allow the water trapped in the pipe to flow through and into the waste. Although this will get rid of most of the water in the system it won’t make it completely dry, so before you start dismantling the tap, place a basin or old towel under the sink to catch drips. Modern taps might have smaller isolating valves on the pipes leading to the tap, allowing you to turn just the tap off and leave the water connected to the rest of the house. These valves look like little taps or levers, and are often metal or red plastic.
Removing the Old Tap
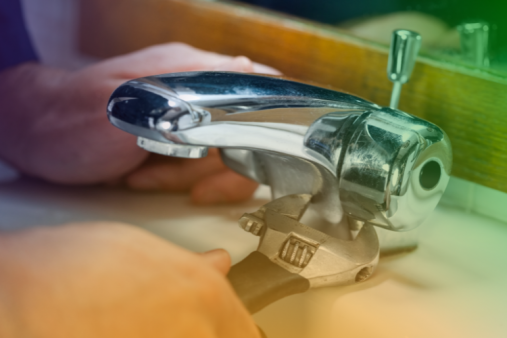
The first job is to remove the old tap from the pipework. Just above the isolation valves, if there are any, there will be nuts which you can loosen with your spanner or wrench. At this point of the process you should expect a few drips from the water trapped in the tap or pipes; it’s nothing to be alarmed by. Once the pipe has been disconnected, it should be a relatively simple matter to pull the tap free. Some taps may anchored into the work surface, so just loosen off all other fastenings and remove the taps entirely
Attaching the New Tap
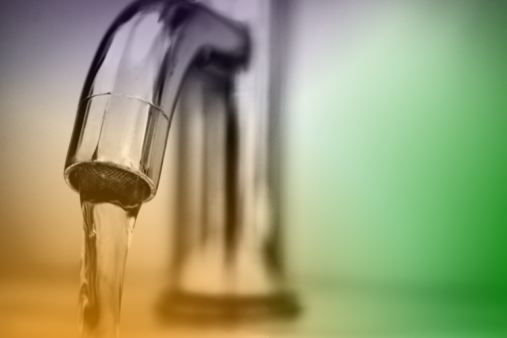
If you’ve bought a tap from a large DIY store there will be instructions in the box to tell you how to fit it. In most cases, it’s just a case of following the removal process in advance. Put the tap into position, connect up the pipes and then carefully tighten up all the bolts and nuts. If something doesn’t look right then stop, and check the instructions before continuing. There are lots of “how to” videos online if you get stuck. Once you’re happy that everything is attached, reconnect the water supply. Check carefully for drips or leaks, as you might have to switch the water off, and tighten the nuts and bolts again.
🚰 10 Frequently Asked Questions About Removing and Refitting a Kitchen or Bathroom Tap
Whether you’re replacing a leaky tap or upgrading to a new design, removing and refitting a kitchen or bathroom tap is a common DIY task. While it’s usually straightforward, there are plenty of questions homeowners have before tackling it themselves. Below are the most frequently asked questions—answered clearly and practically.
1. Do I need to turn off the water before removing a tap?
Yes—always.
Before removing a tap, you must:
-
Turn off the isolation valves (usually under the sink)
-
If no isolation valves are fitted, turn off the main stopcock
-
Run the tap to drain out any remaining water
Failing to isolate the water can result in serious flooding.
2. What tools do I need to remove and refit a tap?
You'll typically need:
-
Adjustable spanner or tap spanner (basin wrench)
-
Bucket and towels
-
PTFE tape (for sealing threads)
-
Screwdriver (for isolation valves)
-
Plumber’s putty or silicone sealant (for new tap base, if required)
-
A head torch (for better visibility under sinks)
A tap spanner is especially helpful for reaching the fixing nuts behind sinks or basins.
3. How do I access the tap fixings?
Access usually involves:
-
Removing anything stored in the cupboard below the sink
-
Reaching up behind the sink or basin to undo the tap retaining nuts
-
For tight spaces, a basin wrench makes the job easier
For bathroom basins, space is often limited, so patience is key.
4. Do I need to disconnect the water supply pipes?
Yes. You'll need to:
-
Disconnect the flexible tap connectors or copper pipes that supply water to the tap
-
Place a bucket or towel underneath to catch drips
-
Use an adjustable spanner to loosen the connections
If your tap is hard-plumbed, you may need a pipe cutter and compression fittings to refit the new one.
5. What’s the difference between mono taps and pillar taps?
-
Mono taps (monobloc) have a single body with one or two levers and usually one hole in the sink/basin.
-
Pillar taps are separate hot and cold taps that require two holes.
Make sure the new tap matches the hole configuration of your sink or basin.
6. How do I ensure a watertight seal when fitting a new tap?
-
Use the rubber washers provided with the tap (underneath the sink and above the tap base).
-
Apply PTFE tape to threaded connectors if necessary.
-
Some people add a small bead of plumber’s putty or silicone around the tap base to prevent leaks from above.
Check all seals are tight, but don’t overtighten as this can damage washers or crack surfaces.
7. Can I reuse the old tap connectors?
In many cases, yes—but with caution.
-
If the connectors are in good condition and match the thread size of the new tap, they can often be reused.
-
If they’re worn, leaking, or incompatible, it's best to install new flexible hoses, which are inexpensive and safer.
Always inspect rubber washers inside the connectors if reusing.
8. How long does it take to replace a tap?
Generally:
-
For experienced DIYers: 30–60 minutes
-
For first-timers or awkward installations: up to 2 hours
-
Add more time if there are corroded fittings, awkward access, or unexpected leaks
Proper prep (like turning off water and clearing space) helps streamline the process.
9. What should I do if the new tap leaks?
If you notice leaking:
-
Double-check that all connections are tight (but not overtightened)
-
Inspect and reseat rubber washers
-
Apply PTFE tape on any leaking threaded joints
-
If water is leaking from the tap body itself, the unit may be faulty and require replacement
Always test both hot and cold sides and check underneath with a torch.
10. Do I need a plumber, or can I do this myself?
You can do it yourself if you're comfortable turning off water supplies, working in tight spaces, and using basic tools.
However, call a plumber if:
-
You lack isolation valves and can’t access the main stopcock
-
Your plumbing is old or corroded
-
The job involves cutting or soldering pipes
Professional help ensures compliance with water regulations and peace of mind.
🧰 Final Tips
-
Take photos of the old tap and pipe setup before removing anything
-
Label pipes if you’re not sure which is hot or cold
-
Don’t rush—tight spaces and awkward fittings can take time
-
Keep towels and a bucket close just in case!