How to Grout Tiles: A Step-by-Step Guide
Grouting tiles is one of the final steps in a tiling project, whether you're sprucing up a splashback or revamping an entire floor. This guide walks you through grouting wall and floor tiles, the tools you'll need, and top tips for a clean, professional finish — even if you're new to DIY.
Tools and Materials You’ll Need
Tools:
-
Rubber grout float
-
Grout spreader
-
Grout finishing tool (or a damp sponge)
-
Bucket
-
Mixing paddle (manual or drill attachment)
-
Clean cloths
-
Dust mask and gloves
-
Sponge and water
-
Grout rake (for removing old grout, if needed)
Materials:
-
Ready-mixed or powdered grout (suitable for wall/floor)
-
Grout sealant (optional for water-prone areas)
-
Grout colourant (optional)
-
Water (if using powdered grout)
Step-by-Step Guide: How to Grout Tiles
Step 1: Prepare the Surface
Ensure the adhesive has fully dried (usually 24 hours). Clean between the tiles to remove any dust or spacers. Make sure the tiles are dry and free of debris.
Step 2: Mix the Grout (if not pre-mixed)
If using powdered grout, follow the instructions carefully. Mix until you get a thick, toothpaste-like consistency. Let it sit ("slake") for a few minutes, then stir again.
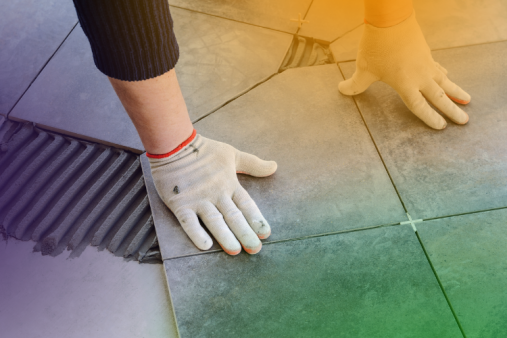
Step 3: Apply the Grout
Scoop grout onto your rubber float and press it into the gaps at a 45-degree angle. Work in small sections to prevent drying out. Apply diagonally to the tile lines to push grout deep into the joints.
Step 4: Remove Excess Grout
Hold the float at a sharp angle and scrape off excess grout from the tile surfaces, again working diagonally.
Step 5: Wipe Down Tiles
Wait 10–15 minutes (check grout packaging), then use a damp sponge to gently wipe the tile surface and shape the joints. Rinse the sponge frequently.
Step 6: Buff the Tiles
Once the grout has dried slightly (about 1–2 hours), a white haze may appear. Use a dry microfiber cloth to buff the tiles clean.
Step 7: Allow to Cure
Let the grout cure for at least 24–72 hours, depending on the type and brand. Avoid getting the area wet during this time.
Step 8: Apply Sealant (Optional)
If using grout in a bathroom, kitchen, or wet area, apply a grout sealant once fully dry to protect from mould and staining.
Printable Tile Grouting Checklist
🧰 Before You Start:
-
Choose grout type (wall/floor, waterproof, colour)
-
Gather tools (float, bucket, sponge, cloth, gloves)
-
Ensure tile adhesive is fully dry
-
Clean joints and remove spacers
🛠 While Grouting:
-
Mix grout (follow pack instructions)
-
Apply at 45-degree angle using rubber float
-
Work in small areas (1–2 sqm at a time)
-
Remove excess grout diagonally
-
Wipe with damp sponge after 10–15 mins
✔ After Grouting:
-
Buff haze off with microfiber cloth
-
Let grout cure for 24–72 hours
-
Apply grout sealant (optional for bathrooms/kitchens)
-
Clean tools thoroughly
10 Frequently Asked Questions About Grouting Tiles
1. How long should I wait before grouting after tiling?
Typically, you should wait 24 hours for tile adhesive to cure before applying grout. Always check the adhesive manufacturer's guidelines.
2. What’s the difference between wall and floor grout?
Floor grout is usually stronger and often contains additives to resist wear and water. Wall grout can be finer for narrower joints.
3. Do I need to seal the grout?
Not always, but in wet areas (showers, splashbacks), sealing helps prevent mould and staining.
4. How do I choose the right grout colour?
Use a complementary shade for a subtle look or a contrasting colour for impact. Sample cards at DIY stores can help.
5. Why is there a haze on my tiles after grouting?
This is normal. It’s called grout haze and can be wiped off with a dry microfiber cloth once the grout sets.
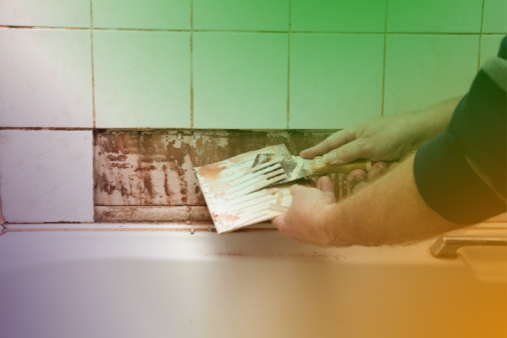
6. Can I grout over old grout?
It’s better to remove old grout using a grout rake for best adhesion. Thin layers over old grout often fail.
7. How wide should tile joints be for grout?
Typically:
-
Wall tiles: 2–3 mm joints
-
Floor tiles: 3–5 mm joints
Use spacers during tiling for consistent gaps.
8. How long does grout take to dry?
Most grout takes 24–72 hours to cure fully. Avoid water exposure during this time.
9. What if grout cracks after drying?
Cracks can be due to movement or poor application. Use a grout repair kit or reapply after removing the cracked section.
10. Can I grout in cold or damp conditions?
Grout dries best at room temperature. Avoid grouting in temperatures below 5°C or very damp environments.