Guide to fitting laminate flooring
Laminate floors are a popular option for modern homes as they are easy to maintain, durable and stylish. Laminate flooring is one of the best choices for a busy family home. It’s hardwearing, modern and comes in a huge range of colours and designs. If you’re thinking about buying laminate for your home, then fitting it is a project which you might be able to take on yourself with some basic DIY skills and know-how.
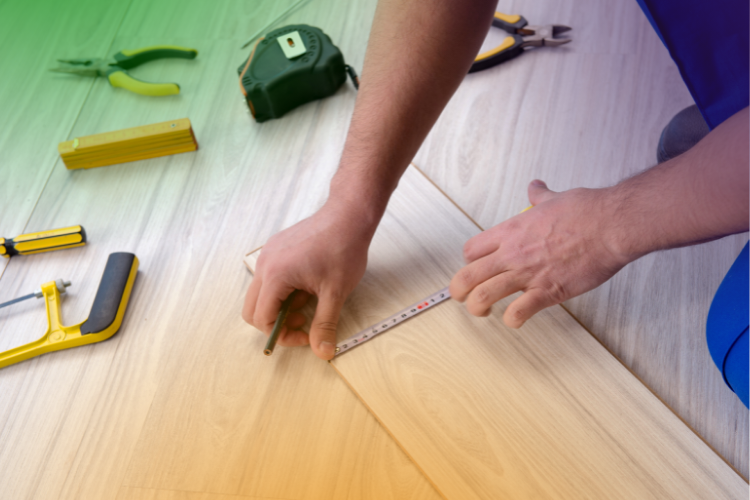
What you'll need for the job
Preparation is key to any DIY job. Start by working out how many packs of laminate you’ll need to buy. Measure the length and width of your room to calculate the total area. This should give a rough guide to the number of packs you’ll need. It’s usually best to buy an extra pack or two just in case. Most DIY stores will refund unopened packs if you end up not using them. Check to see whether you need to put down underlay underneath your new laminate floor, and source that too. You’ll also need a basic tool kit for the job including a mitre saw, hammer, tape measure, safety goggles and a Stanley knife. Lots of laminate is “click” laminate which doesn’t need glue, but you may need glue or small pins to fasten the planks together.
Step by step guide to laying flooring
If you don’t know how to lay laminate flooring, follow the guide below.
This is a tricky job and requires good DIY skills so if you’re not sure that you’re up to it, call a professional flooring specialist.
Prepare your floor before you start, making sure they’re level, dry and firm before you begin laying your flooring.
Flatten any nails in the floorboards using a hammer.
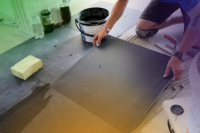
If you’re laying laminate flooring over a new concrete base, make sure it’s dry first.
If it’s old, uneven concrete, you can level it out using a self-levelling compound.
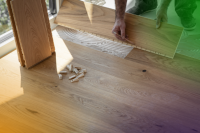
Fitting the underlay
You must always fit an underlay before laying laminate floors.
There are different types of underlay, but you should never use a carpet underlay.
Here are the three types of underlay you can use:
Different types of underlay
- Poly foam underlay - this is a thin underlay that’s best used with a firm, level sub-floor such as chipboard, hardboard or plywood.
- Combined underlay - this is thicker than poly foam underlay and is a good sound insulator.
- Wood fibre boards - these are the thickest type of underlay you can find, good for levelling out an uneven sub-floor and keeping in the heat.
Follow the manufacturer’s instructions to fit the underlay, then you’re ready to start laying your laminate floors.
Acclimatise your flooring
Give your laminate floors time to acclimatise to the room by leaving the boards in there for about 24 hours first. Open the packs you are sure you will use and leave them to breath in the room you are going to lay them as part of the acclimatisation process.
When you’re laying the flooring, keep in mind that laminate flooring will naturally contract and expand - so leave a 10mm gap between the floor and the skirting using wedges or spacers.
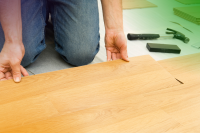
Starting to lay the laminate floor
Work out which direction you want to lay the boards in. Ideally, you should lay your boards in the same direction as the light that enters the room. Start in a corner, and start laying boards along the length of the room, with the tongue side of the board facing the wall. Make sure the board is square with the wall. Lay your next board at the end of the first one, and carry on until you’ve reached the wall. When you get to the end, cut the board to fit. Start the next row with the cut board so that the planks are overlapping as you progress along the rows. When it comes to door frames or corners, you’ll have to cut the boards to fit. This is the tricky bit. There are lots of videos online walking you step by step through cutting boards to shape and we’d advise watching several of those before getting the saw out.Use the proper equipment, including goggles. The best saw to use for laying laminate flooring is a jigsaw, which is perfect for cutting out intricate shapes so that boards can fit around ornate door frames, and heating pipes. Continue placing boards along the room until you eventually get to the opposite corner from where you started, hopefully before you run out of planks. Continue across the room, staggering the joints so that you’re not repeating the pattern. To get the final pieces of wood in, a good tip is to cut it so it’s about 10mm narrower than the remaining gap. If it’s awkward to fit, you can try levering it in with a chisel until it slots into place.
Adding finishing touches to your laminate flooring
If you’ve taken off the skirting boards to lay your laminate flooring, then the last job is to replace them and cover the raw edges. If not, get some lengths of beading to bridge the gap. You’ll again need to cut it to fit, using a mitre to angle the corners. Beading can then be painted to match the woodwork, or stained to match the floor.
Getting Someone to Do It For You
Laying laminate flooring requires decent DIY skills. If you have any doubts at all, be sure to contact a flooring specialist. Ask different tradesmen to quote you a price for the job, that way you’ll find the best deal! Not everyone has the time or inclination to lay their own laminate flooring. If you’re not up for the challenge, a joiner will be delighted to help. They will quote a price per square metre for the job. Typical rates are between £8 and £15 per square metre. Check whether the price includes finishing the work with beading, or removing and replacing skirting boards. Ask for recommendations of trusted joiners locally, and always ask for a couple of quotes before deciding whether or not to go ahead.
Image Attribution
Image supplied under a Creative Commons License
![Maple Sonora [living room]](https://farm6.staticflickr.com/5185/5621505611_6c676488a2_n.jpg)