If you’re unsure how to fit a bath panel, don’t worry - use our guide on how to fit a bath panel and you’ll be luxuriating in a bubble bath in no time at all!
Alternatively, find a local bathroom fitter and that relaxing bath will be even closer than you think.
Step By Step Instruction For Fitting A Bath Panel
If you’re replacing an old bath panel, unscrew it from the bath frame and you should be able to pull it out easily.
There are a few awkward bath panels that will have hidden fittings or brackets, so make sure that you unscrew these too.
Once you’ve removed the old bath panel, you’re ready to measure up for the new one.
If you’re lucky, your bath panel will already fit your bath but in many cases, you’ll have to tailor the bath panel to your requirements.
Building A Bath Panel Frame
Before you do this, you should build a wooden frame for the bath panel.
This will secure it in place and reinforce the bath panel against bumps and knocks in the future.
Make sure the timber you use is strong enough to stabilise the bath panel - 50 x 25mm timber is ideal.
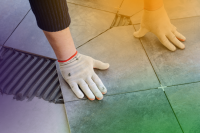
If a wooden frame is not an option, then try to fix some timber along the floor at the bottom of the bath - that way, you’ll stop any movement to the bottom of the bath panel.
Remember, if DIY’s not your thing, get some competitive prices from your local bathroom fitters.
It’ll be worth it in the long run and you’ll avoid any damage to your bathroom units or yourself!
Before you start to cut, make sure that cutting your bath panel will not damage its construction.
Now measure the void underneath the bath and cut your bath panel to fit this space.
A handy tip to keep in mind is to measure twice, cut once.
Tools Needed
A fine blade jigsaw or handsaw should be perfect for cutting your bath panel, and can tackle either acrylic or wood.
Be careful not to damage your new bath panel by using excessive force!
If you’ve cut a wooden bath panel to size, be sure to add some PVA glue to the end where you cut, it will stop any water from seeping through.
Now you’re ready to secure the bath panel.
Place it under the lip of the bath, then screw the panel onto the frame.
Then it’s just a case of screwing the panels together.
Mirror screws will give it a professional looking finish - just the touch to complete the perfect look for your bathroom.