How to paint on new plaster
Whats involved with painting on new plaster?
Painting new plaster - If you’re planning renovations at home and don't want to hire a decorator, it’s natural to want the job done and completed as soon as possible. It can be frustrating living in disruption with a half-finished job.
However, rushing ahead and painting on new plaster just to get the job finished might make things worse in the long run.
The problem with a newly plastered wall is that it is full of moisture.
Can you paint directly on new plaster?
It is advisable to add some kind of undercoat or base coat when looking to paint directly on new plaster. Watered down emulsion is a good option to apply as a thin base coat. There are also special paints available for painting on new plaster.
If you paint on top of damp plaster, the paint will form a seal on the wall.
This will stop the water in the plaster from evaporating naturally. This excess moisture in your wall could go on to cause huge problems with damp.
It could cause damage to the wall itself when water reacts with salts in bricks.
The simplest way of ensuring that your walls are dry is to wait.
How long before you can paint on new plaster?
How long a wall takes to dry our will depend on the weather.
How many coats of plaster have been applied will be a factor too.
The average wall in a centrally heated house takes around four weeks to dry out completely.
Different materials take longer to dry out than others. For example, on average plasterboard can take 2-3 days to dry after plastering. Backing plaster can take longer than plasterboard to dry, at 4-6 days.
Depending on circumstances it can take longer.
Watch out in situations where there is water and steam present as circumstances may impact for the likes of kitchen paint and bathroom paint. In some circumstances you are best advised to use specialist paints for these types of areas.
If you are in a hurry to paint your new plaster, you can speed up the drying process by hiring large heaters from tool hire shops.
Once the plaster has dried out – is sealing required?
Even if you have allowed your plastered wall time to dry out completely, that’s not the end of your problems.
Even a perfectly plastered wall will have minor imperfections on its surface.
As plaster dries a fine layer of dust can form on the surface.
For this reason, many experts advise that a wall is “sealed” before you apply paint.
There are a couple of ways of doing this.
The first option is to make up a solution of half white PVA glue and half water.
Brush the solution onto the wall and leave it to dry.
Alternatively, use the cheapest white emulsion you can lay your hands on and dilute it with water.
Apply the mixture created with the emulsion to the wall.
This is sometimes known as a “mist coat” and can also help show up any flaws or uneven patches when painting on new plaster.
You can then sand or fill before applying a final coat of emulsion to your wall.
For a detailed run through on the process and some of the challenges we created the content below.
Step by step gide to painting freshly plastered walls in your home
Here are a few areas where you need to pay particular attention to avoid issues when painting your newly plastered walls.
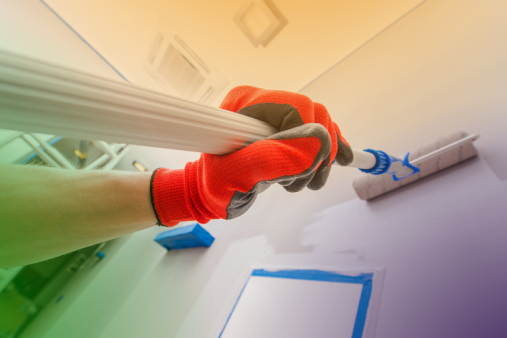
1. Always seal newly plastered walls
The first thing you need to do with newly plastered walls is to prevent the surface from being as absorbent so that when you apply the topcoat of plaster it then sticks properly.
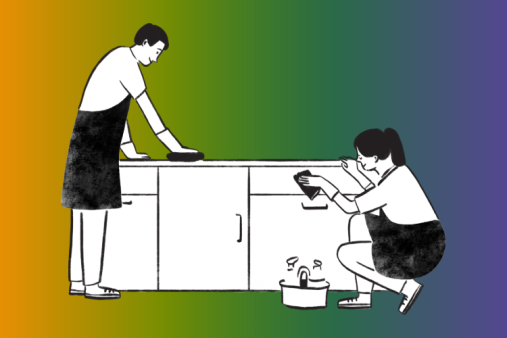
A good solution, and one which is used frequently is to mix water and simple emulsion together and apply this to the surface of the freshly plastered wall before starting your paint-job properly.
This is commonly known as a mist coat. The purpose of applying this thin coat of emulsion-water mixture is to give the plaster the task of soaking up the water in the mixture. When soaking up this water the plaster then becomes far less absorbent and this lays the foundation for the proper base coat of paint.
A 70/30 ratio of paint to water will usually be the most suitable mixture for your mist-coat. You can always add more water if the mixture is still too thick afterwards. You should also be sure that the paint you are using for the diluted mixture is a non-vinyl paint too. You should also ensure that the watered-down paint is mixed from a light coloured paint too (ideally white).
2. Using watered-down emulsion as a mist-coat
Be careful when using the watered-down emulsion mixture for your mist-coat. It can be messy and there will be plenty of dripping as the water naturally thins out the paint. When using this mixture ensure you use plenty of dust-sheets and keep wiping down the roller and rubbing in any drip marks in the coating as you apply so that you do not end up with a less than professional finish which could ruin the whole job.
3. Avoid problems with white topcoat
One problem you might find if you apply a white top coat of paint to new plaster is that it can take many different coats to cover the surface properly, and this could appear in patches too. If you are finding that you get some problem areas then a good stain block for paint or a good base-coat for emulsion can help a lot on these patchy areas. Applying a base coat or stain blocker will undoubtedly save you time and money if you are having a patchy wall problem.
4. Use specialist paints for new plaster
 The paint industry has long been aware there will be occasions where you have no option but to paint over walls which are not perfectly dry. There are specialist paints for new plaster which you can buy in good DIY stores. Paint for new plaster is designed especially to cover plasterboard, brick, concrete and new plaster. Microporous paints – also known as “breathable” paint – allow you to go ahead and paint the walls straight away. At the same time this paint allows for the plaster to continue drying. The drying process continues afterpaint application because of the mixture of polymers in the solution. The polymer mixture allows the substrate to breathe properly and continue to dry even after the new paint has been applied to the fresh plaster. Specialist paints for new plaster will be more expensive than if you simply water down a cheaper emulsion, however, you will find they are usually much less messy as they do not have the 'drip-everywhere' problem of watered down emulsion. Specialist paints for new plaster may also be available in only a limited number of colours compared with normal paint. These microporous paints are also often intended for external use rather than internal use. Choices may be limited. It can also be harder to get the right finish when working with specialist paints for newly plastered walls because their edges are much harder than the soft effect of diluted emulsion as a mist-coat. If you are in a real hurry and cannot wait for your walls to dry out naturally, they might be the best option though.
5. Watch out for damp
Despite your best efforts sometimes damp coming through the plaster prevents new plaster drying out properly. It is often a good solution to simply take the plaster right back to the brickwork (i.e. remove the plaster on the damp areas), and get a plasterer in to apply a render mix (sometimes referred to as tanking) to the area behind where the plaster will be applied, before replastering it. There are special mixtures for rendering and tanking. Applying render mixtures to brickwork before you plaster should help to stop the water from the moisture coming through from the brickwork again and the new plaster should dry out as it normally would without the damp. You should also investigate the cause of the damp in the first place as other problems could arise.