Plastering Advice & Tips - About Rendering A Wall
What Is The Purpose Of Rendering?
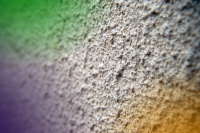
The purpose of rendering is to help weatherproof exterior walls as well as to create a finish in pleasing textures.
To this end, a rendered wall can be finished with a relatively smooth coat or with additives of small stones, clippings and other texturizing materials.
How To Do Rendering
To repair an existing rendered wall, cleaning and preparation are the most important steps for a successful project.
Inspect for cracks as well as locations where the rendering is no longer bonded to the wall which is indicated by bubbling or a hollow sound when tapped.
To patch a crack, widen the crack with a trowel or screwdriver to remove all debris and dust from the render, then using a trowel, press the mortar mixture into the crack and smooth.
Once the crack repair has cured, a finish render coat may be placed over the whole surface or a masonry paint may be applied to disguise the repair job.
Before applying a finish render coat, be sure to thoroughly wash the wall with a strong stream of water or a power washer, it may also be necessary to wash the wall with a fungicide if there is evidence of mould.
Apply render mortar mixture in consistent thin coats, approximately 8-10mm, since uneven render coats can result in shrinkage and other curing problems.
Things To Remember When Rendering
When rendering a wall for the first time, prepare the wall with a thorough cleaning and treat for mould or plant growth.
A harling coat of aggregate and lime should be applied on the wall surface to increase bonding and prepare for subsequent coats.
The harling coat is applied by briskly flinging the mortar on the wall with a harling trowel or a coal shuttle.
This preparation coat should be allowed to cure for four days before the first scratch coat of render can be applied.
The first coat of render is troweled on in thin even coats of 8-10mm and smoothed with a plaster darby.
After tightening, scour the render in circular motions with a wood or polyurethane float.
Avoid overworking the render as it can bring lime to the surface.
The render surface should be scored in diagonal strokes in order to create a rough surface for the next coat to adhere to.
This scratch coat of render needs to cure for four days and should be kept damp to prevent the drying to occur too rapidly.
Wet down the render before applying the final coat of render which is applied in the same manner as the scratch coat.
Don't forget that if you decide that DIY plastering is not for you, you can always compare quotes from local plasterers using Top Tradespeople's free tradesmen comparison services.
Post a plastering job to start to get matched, without obligation with plasterers in your area.