How to Lay a Wooden Floor
Laying your own wooden floor is a satisfying and achievable home improvement project. Whether you’re refreshing a tired living space or updating a room during a renovation, installing a wooden floor can instantly elevate the look and feel of your home.
This step-by-step guide covers everything you need to know to get the job done right — from preparation through to the finishing touches.
What You’ll Need
Tools & Equipment:
-
Tape measure
-
Pencil and set square
-
Spirit level
-
Rubber mallet
-
Flooring pull bar
-
Spacers (for expansion gaps)
-
Mitre saw or jigsaw
-
Hammer and nails or flooring nailer (for solid wood)
-
Underlay (if needed)
-
Adhesive (if gluing)
-
Safety goggles and dust mask
Materials:
-
Wooden flooring (engineered or solid wood)
-
Matching skirting board or beading (optional)
-
Underlay (foam, fibreboard, or damp-proof membrane depending on floor type)
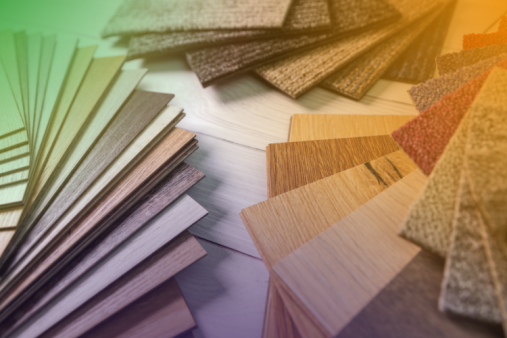
Types of Wooden Flooring
Before you begin, decide which type of wooden floor best suits your space:
-
Engineered wood flooring – more stable and suitable for rooms with underfloor heating or fluctuating humidity.
-
Solid wood flooring – made from single timber boards; ideal for traditional interiors but more sensitive to moisture.
-
Click-lock flooring – typically engineered, easy for beginners to install without glue or nails.
Step-by-Step: How to Lay a Wooden Floor
Step 1: Acclimatise the Flooring
Allow the wooden boards to acclimatise to your home’s temperature and humidity. Leave them in the room (in their packaging, flat on the floor) for at least 48 hours before installation.
Step 2: Prepare the Subfloor
Ensure the subfloor is:
-
Level – use a spirit level and sand or fill any uneven areas.
-
Dry – moisture can damage wood, so check for damp. Use a damp-proof membrane if necessary.
-
Clean – sweep or vacuum to remove all dust and debris.
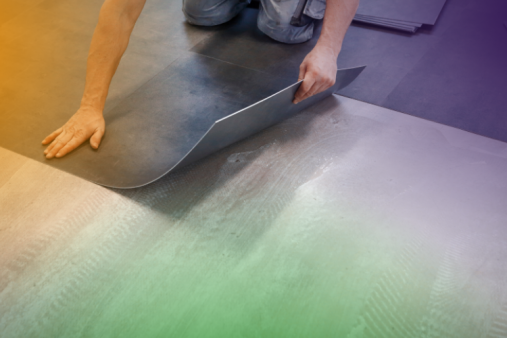
Step 3: Install the Underlay
Lay your chosen underlay across the subfloor. Tape the seams together to create a continuous surface. Underlay reduces sound, insulates, and smooths out minor imperfections.
For concrete subfloors, use a damp-proof underlay. For timber floors, fibreboard may help level slight unevenness.
Step 4: Plan the Layout
Plan how your boards will be laid. The most common orientation is lengthways in line with the longest wall or the direction of natural light.
Dry-lay a few rows to check alignment and avoid narrow boards at the wall edges. If necessary, trim the first row to ensure a balanced look.
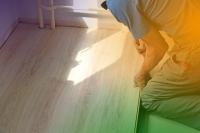
Step 5: Start Laying the Boards
Begin in a corner of the room, with the tongue edge facing the wall. Use spacers to maintain an expansion gap of 10–15mm between the boards and the wall — essential for allowing the wood to expand and contract.
For click-lock boards:
Click the tongue and groove edges together at an angle, pressing down to lock into place.
For tongue and groove boards:
Apply a wood adhesive to the groove and tap the boards together with a mallet and tapping block.
Step 6: Continue Across the Room
Stagger the end joints between rows (minimum 30cm) for a natural, stronger layout. Cut the final board in each row to fit, using a mitre saw or jigsaw.
Use a pull bar to snugly fit the last board in each row, especially against the wall.
Step 7: Cut Around Obstacles
Mark and carefully cut boards to fit around door frames, radiator pipes, or other obstacles. You may need to undercut door architraves so boards can slide underneath for a seamless look.
Step 8: Fit the Final Row
You may need to trim the width of the final row of boards. Measure the gap (don’t forget the expansion space), mark the boards and cut to size. Use a pull bar to fit them tightly in place.
Step 9: Finish the Edges
Remove the spacers. Cover the expansion gap with either skirting board or scotia/beading. If you’re keeping existing skirting, fit scotia moulding over the gap.
Nail or glue the beading to the wall (never to the floor) to allow for movement.
Step 10: Clean and Enjoy
Hoover and gently clean the new floor with a suitable wood floor cleaner. Avoid excess water or harsh chemicals.
Top Tips for Success
-
Always lay flooring in dry conditions — avoid damp days or freshly plastered rooms.
-
Keep a few spare boards for future repairs.
-
If laying over underfloor heating, ensure your flooring is compatible and follow manufacturer guidelines carefully.
-
Work slowly and precisely – rushing can lead to gaps, misaligned boards, or wasted material.
When to Consider a Professional
If your subfloor is particularly uneven, damp, or you’re working with expensive solid wood, it might be worth getting a professional fitter involved for peace of mind.
With the right preparation, patience, and a little bit of elbow grease, laying a wooden floor can be a rewarding DIY project that adds style and value to your home. Good luck!
Frequently Asked Questions About Laying a Wooden Floor
1. Can I lay a wooden floor over existing flooring?
Yes, in many cases you can lay engineered or click-lock wooden flooring over existing floors like vinyl, laminate or floorboards — as long as the surface is flat, dry, clean and stable. Avoid laying over carpet or any soft/flexible surfaces.
2. Do I need underlay beneath a wooden floor?
Yes, underlay is recommended unless you’re gluing the floor directly to the subfloor. It helps with insulation, reduces noise, and smooths out minor imperfections. For concrete floors, always use an underlay with a damp-proof membrane.
3. What's the difference between engineered and solid wood flooring?
-
Engineered wood consists of a real wood top layer bonded to layers of plywood — it’s more stable and suitable for underfloor heating and moisture-prone areas.
-
Solid wood is one piece of timber and offers a classic, long-lasting finish but is more sensitive to temperature and humidity changes.
4. How much expansion gap do I need around the edges?
Leave a 10–15mm expansion gap around all edges of the room — including at doorways, pipes, and fixed objects. This allows the floor to expand and contract with temperature and humidity changes.
5. Can I install wooden flooring in a bathroom or kitchen?
Engineered wood can be used in kitchens and bathrooms if it’s well-sealed and properly maintained. Avoid solid wood in these areas due to the high moisture levels. Always wipe up spills promptly.
6. Do I need to remove skirting boards before laying the floor?
Not necessarily. You can:
-
Remove the skirting and refit it over the floor for a clean look, or
-
Leave skirting in place and add scotia/beading to cover the expansion gap.
7. How long should I acclimatise the flooring before installation?
Let the flooring sit in the room (in its packaging) for at least 48 hours before fitting. This allows it to adjust to the room’s temperature and humidity, preventing future warping or gaps.
8. Can I lay a wooden floor myself, or should I hire a professional?
Yes, many types of wooden flooring can be laid DIY, especially click-lock or engineered systems. However, if your subfloor is very uneven, damp, or you’re using solid wood, a professional may be advisable.
9. Is wooden flooring compatible with underfloor heating?
Engineered wood flooring is suitable, but always check with the manufacturer. It must be correctly installed with a compatible underlay and temperature settings. Solid wood is generally not recommended over underfloor heating.
10. How do I maintain a wooden floor once installed?
-
Sweep or vacuum regularly using a soft brush attachment
-
Use a damp (not wet) mop and a wood-safe cleaner
-
Avoid dragging heavy furniture
-
Use felt pads under furniture legs
-
Clean up spills quickly to prevent staining or warping